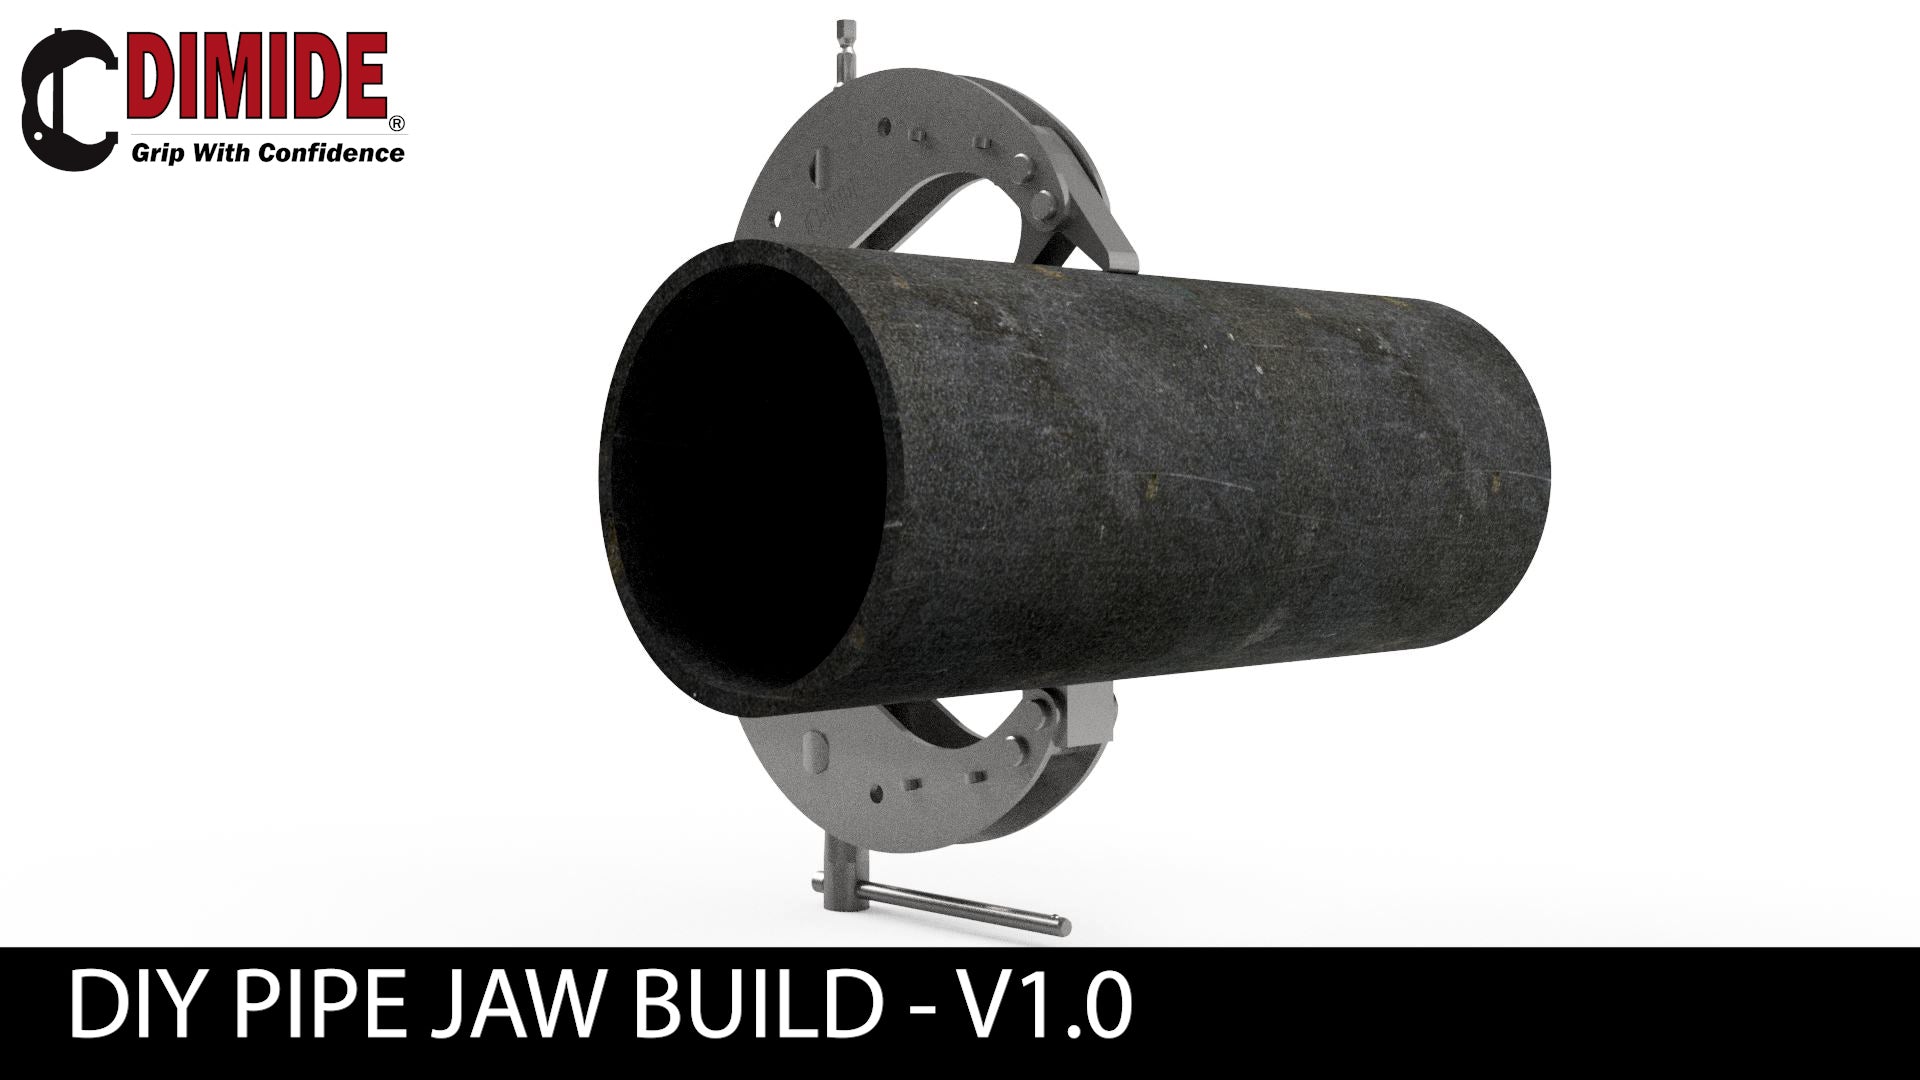
DIMIDE 1/4 Series Clamp - DIY Pipe Shoes
Turn your DIMIDE 1/4 Series Clamps into a pipe camp with this DIY modular pipe shoe design!
We will be launching these modular pipe shoes shortly for pre-order.
All files (Drawings, .stp, and .dxf) for this build are available on grabcad at the following link. https://grabcad.com/library/dimide-1-4-series-clamp-diy-modular-pipe-shoe-1
We also have an instructable on this build at the following link. https://www.instructables.com/DIMIDE-14-Series-Clamp-DIY-Modular-Pipe-Shoe/
Design Background
The DIMIDE ¼ Series Clamp was designed with customization in mind. Our goal was to make it as modular as possible.
30 Deg Pipe Shoe - Iteration #1
We knew that we needed it to be able to act as a pipe clamp which required some creativity due to it’s rotating shoes. We tried making a clamp pipe shoe that was angled at a 30 degree to the rotation, but the shoe still rotated off of parts while clamped.

We thought about making it a 45 degree angle, however we couldn’t get over how limiting it was to need to orient the clamp 45 degrees to what you were clamping.
Anti-Rotation Hole - Iteration #2
In the end the solution was rather simple, if you want to prevent rotation of something you just have to pin at two locations. We then added an anti-rotation hole near our primary shoe mounting hole that could prevent the shoe from rotating when desired as shown below.

The only downside of the anti-rotation pin was that as the clamp opens and closes the shoe would rotate in relation to what you were clamping. We learned that this rotation limited the clamp’s capacity to secure a large range of pipe diameters.
Double Sided Pipe Shoe - Iteration #3 & Final
One of our awesome customers and supporters then recommended making a double-sided pipe shoe with each side being configured to clamp differing diameter ranges. Combining that with using laser cut ½” steel plate made this an ideal design.
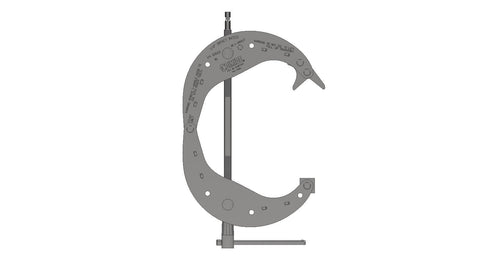

The double sided jaws allowed for clamping any pipe between the diameters of ¼” and 5” perpendicular the clamp which fit while remaining easily manufacturable. This fit every single design goal we had for our pipe shoe.
DIY Pipe Shoe Build Guide
Step 1: Print & Tape on Cut-Out Drawings & Mark Holes


To get started you will want to print the cut-out profiles. As shown in the video, you do not need to be perfect when cutting out the profiles, they are just for references for starting cuts.
Once the profiles are cut out, tape them firmly to the 1/2" steel plate so they don’t move.
Once the profiles are taped onto the steel, use a punch to mark the centers of the holes. This ensures that you will be able to center the drill on the appropriate location even if the paper moves.
Step 2: Drill Holes
Start by clamp your steel plate to a drill press. As shown in the video, we found that we only need one ¼ Series Clamp to adequately secure the steel plate when used with an impact driver. You may opt for using 2 clamps instead.
Start by using any drill bit between a 0.257” aka F drill bit and a 0.266” aka H drill bit in diameter to drill out the two mounting holes and the center points for the small and large pipe v-profiles. Note that the closer you make the hole diameter to 0.250” the more accurate you will have to be with you drilled holes to ensure you don’t have an interference fit when attaching the shoe to the clamp.
Once the smaller holes are drilled out, switch to a 1.0” or #1 drill bit and drill out the final hole. If your plate isn’t clamped firmly with a higher end impact driver than you may need a 2nd clamp for this hole.
Step 3: Cutting Profile With Grinder
Using a grinder start cutting out the profile by aligning the grinding wheel just to the outside of the taped-on profile. For strength, it is better to leave extra material than to cut inside or directly on the lines. Once the grinding wheel is aligned start your cut and try to end tangentially to the already drilled hole. For added strength target the center of the hole instead of tangentially to the hole. You can always grinder off a little more material after the initial cut.
Step 4: Finishing/Cleaning Up the Edges
You don’t want to cut yourself with your new shoe so use a gentle grinder to clean the edges and remove any excess material you don’t want.
Step 5: Insert It Into the DIMIDE ¼ Series Clamp and Clamp Some Pipe!
Use a 2nd DIMIDE upper detent pin to insert you new pipe shoe into the clamp. If you don’t have a 2nd pin then use a ¼” bolt or whatever else you have available to secure the anti-rotation hole.
Bonus: Use the provided extra mounting holes to store other shoes while they are not in use.